Navigation and UI
The user interface (UI) is the main way to interact with the applications and information in a Brinqa instance.
BUI5
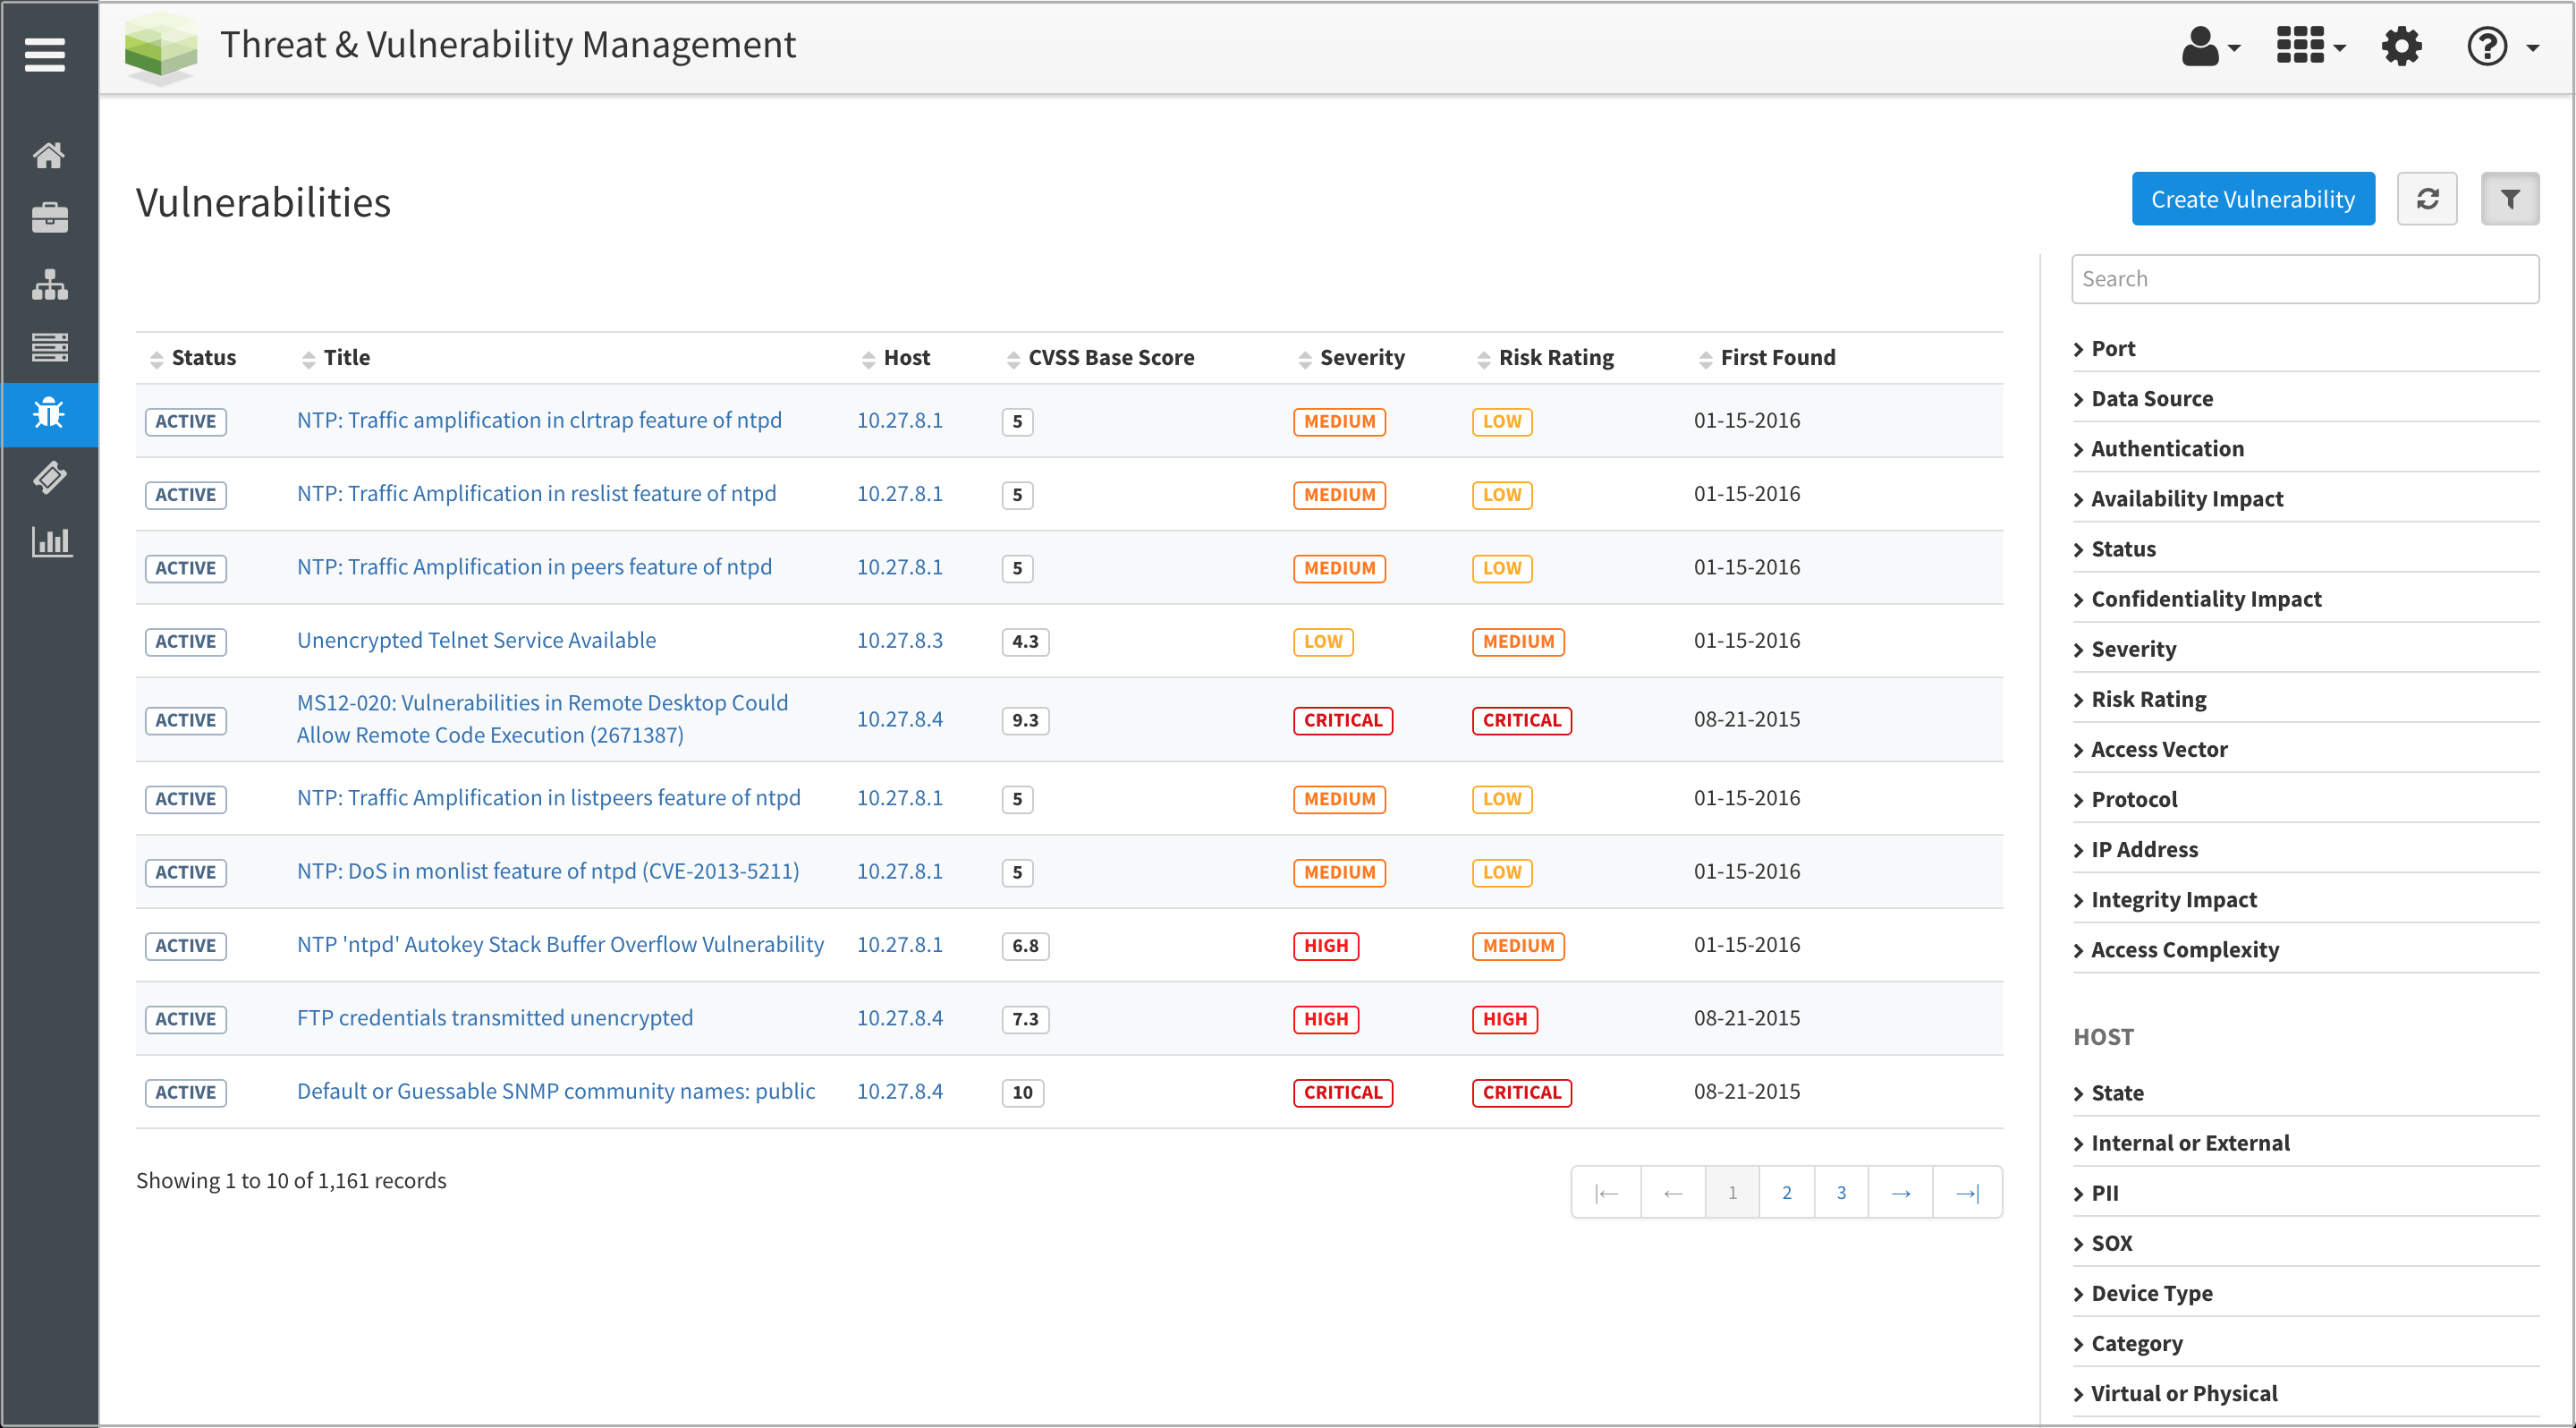
The Brinqa 5.x user interface provides an updated look and usability improvements. Notable features include a single-page application for faster content loading, server-push using web sockets, a redesigned application navigator, and an enhanced view builder.
Figure 1. BUI5 user interface

Table 1. User interface components
| Component | Description |
|---|---|
| Application header | A branded header, runs across the top of every page and contains the application name and logo, and links to administrative modules. See the table below for more detail. |
| Application navigation | Also called the left-navigation bar. Provides links to all modules within the current application. |
| Content frame | The central part of the layout, where most information is displayed in list, form, and show views. |
Table 2. Application header modules
| Control | Description |
|---|---|
| User menu | Provides access to the following options:
|
| Application launcher | Provides a link to the application launcher, a list of available applications. |
| Administration | Provides a link to current application's administration module. |
| Help | Provides options to open product documentation and contact support.
|
Logging in
Each Brinqa instance has a unique, secure web address. The base URL for each instance has the default format: https://<instancename>.brinqa.net
Users log in to the instance from a web browser.
- Enter the base URL in any web browser.
- If your system uses external authentication, you are automatically logged in. For example, you may log into company services when you log in to your computer.
- If your system does not use external authentication, the Welcome page appears.
- Enter your user name and password.
- Press the Enter key or click Sign in.
View or update your user profile
All users can update personal information in their user profile.
Users can update their first name, last name, and email.
- Click the User Menu icon in the application header (upper right).
- Select Profile.
- Click Edit to update information like first name, last name, and email address.
- Modify desired fields.
- Click Update to save your updated changes.
Change your password
All users can change their passwords.
- Click the User Menu icon in the application header (upper right).
- Select Profile.
- Click Change Password.
- Enter current password and new password.
Note: The Update button will be enabled only if the new password meets the password policy requirements.
The default password policy expects Good level. - Click Update to save your updated password.