Attributes
The topics listed on this page provide information on attribute administration.
Introduction to attributes
The individual pieces of data in a record are called attributes. They are associated with data models.
Users can enter data in attributes by using using a form. In form view, attributes appear as fields in the form, and in list view they appear as columns of data in the table.
Administrators can create new or modify existing attributes.
Attribute types
These attributes types are available to administrators when creating new attributes or changing the type of existing attributes.
Important
If you edit a field on a child data model that is present on the parent data model, you will also change it for the parent data model and all other child data models.
Table 1: Attribute types
| Attribute Type | Description |
|---|---|
| Attachments | File attachments on form views and list attachments with date and type on show views. |
| Auto Number | Automatically assigns a unique number to each dataset. Tickets are an example of data model that has Sys ID attribute which is an auto number type. |
| Calculated | Automatically calculate values based on other values or attributes. |
| Comments | Captures and displays user comments. Comments are associated to each dataset and can be entered and edited using the comments widget. Each comment records author, date and time in addition to text. |
| Currency | Decimal attribute with configurable digits after the decimal point. Brinqa automatically formats the value as a currency amount. |
| Date | Day, which can be selected with a calendar widget. |
| Date/Time | Day and time of day, which can be selected with a calendar widget. The time of day includes AM or PM notation. |
| An email address with default of 40 characters, which is validated to ensure proper format. | |
| HTML | String attribute with a built-in HTML editor. |
| Labels | Any combination of letters, numbers, or symbols representing a tag. |
| Master Detail | A relationship between datasets where the master dataset controls certain behaviors of the detail dataset such as dataset deletion and security. |
| Multiple Choice | Drop-down list of choices that can be configured. |
| Number | Number with configurable decimal places (for example, 12.34). |
| Password | Text field that stores passwords with one-way encryption. One-way encryption stores the password as a secure hash value that cannot be decrypted. |
| Percentage | A number representing percentage. You can set a maximum length and decimal places, Brinqa automatically formats the value as percentage format, (for example, 10%). |
| Phone | Text attribute that provides formatting and validation for telephone numbers. |
| Reference | A relationship between two datasets so you can associate them with each other. For example, vulnerabilities have a lookup relationship with hosts that lets you associate a particular host with a vulnerability.
|
| Single Choice | Drop-down list of choices that can be configured. |
| Status | A status type attribute that allows the configuration of a drop-down list of choices and default values. |
| Text | Any combination of letters, numbers, or symbols. You can set a maximum length, default is 255 characters. |
| Text Area | Any combination of letters, numbers, or symbols that display on separate lines similar to a Description field. You can set the length of this attribute type to a certain limit, if desired. The default is 500 characters. Note that every time you press Enter within a long text area field, a line break and a return character are added to the text. These two characters count toward the character limit. |
| Time | Time of day, which can be selected with a time widget. The time of day includes AM or PM notation. |
| True False | Indicating a true or false attribute of a dataset. |
| URL | String field that is a clickable URL. When users click on the link value, the URL will open in a separate browser window or tab. |
Choice lists
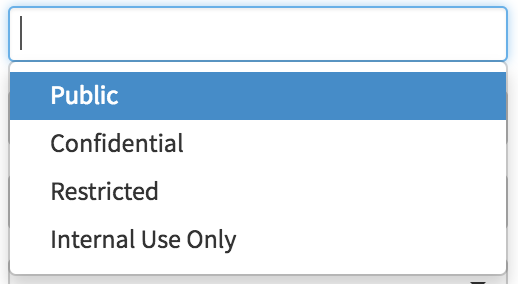
A choice list is a type of attribute that lets the user select from a pre-defined set of choices. There are two types of choice lists,
-
Single choice : Only a single choice can be selected from available options.
-
Multiple choice : Multiple choices can be selected from available options.
Administrators can define the available choices and customize the behavior of choice lists.
Figure 1. Application data classification choice list
Define an option for a choice list
Procedure
- Navigate to Administration -> Data Management -> Data Models, select the data model that contains the choice list attribute, and go to the Attributes section
- Select the choice list attribute
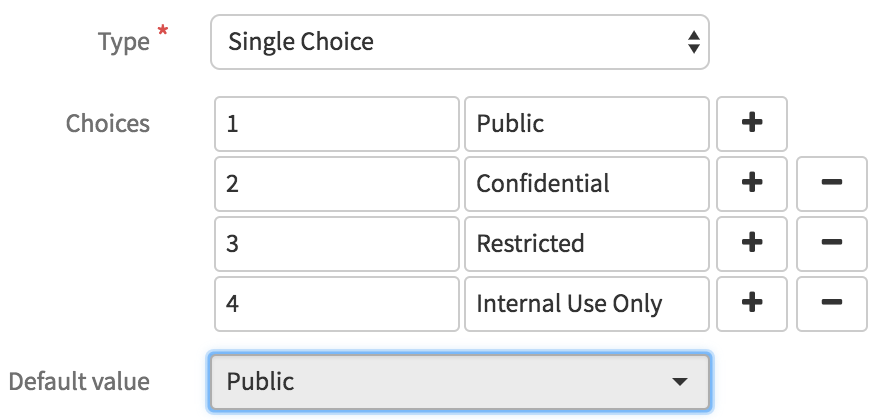
- Using the choices field, add title and value. Title will be shown to users on the list, form and edit views. Value will be stored in the database and exported to any external data destination.
- (Optional) You can select a default value from available choices. The default value will be the pre-selected choice on the form, and also when the dataset is created by blank value.
- Click Update on the attribute modal.
- Click Update to save your changes to the data model.
Figure 2. Application data classification choice options
Reference attributes
A reference attribute stores a reference to an attribute on another data model. For example, the Owner attribute on the Host data model is a reference to the User data model.
When you define a reference attribute, the system creates a relationship between the two data models. Adding a reference attribute to a view makes the other attributes in the referenced data model available to the view.
Administrators can create new reference attributes and configure several options for reference attributes.
| Field | Description |
|---|---|
| Related to | Select the target data model for the relationship. |
| Filter | You can define a set of conditions, the system will use these conditions to pre-filter available references. In addition, the system will perform a validation check before creating the new dataset. |
| Association | Indicates if this is a 1:1 or 1:n type of association. |
| Child relationship name | The name of the relationship. |
| When record deleted | There are different options for how the deletion will affect datasets that reference the deleted dataset. You can configure what happens to dataset that reference a dataset when that dataset is deleted.
|
Master detail attributes
A parent-child relationship in which the master object controls certain behaviors of the detail object:
- When a dataset of the master object is deleted, its related detail datasets are also deleted.
- The detail dataset inherits the sharing settings of its master dataset.
- The master-detail relationship attribute is required on the form of the detail dataset.
- By default, datasets can’t be reparented in master-detail relationships. Administrators can, however, allow child datasets in master-detail relationships on data models to be reparented to different parent records by selecting the Allow reparenting option in the master-detail relationship definition.
Note
When you define a master-detail relationship, the data model on which you are working is the detail side. Its datasets can appear as a related list on view for the other data model.
See reference attributes for common relationship options.
Attribute options
An attribute's metadata consists of several options.
Table 2: Attribute metadata
| Option | Description |
|---|---|
| Active | Marks the attribute as active. Inactive attributes do not loose their values, however they will not be shown on views and included in calculations. |
| Child relationship name | The name used in API for relationship queries. |
| Decimal places | For currency, number, and percent fields, this field represents the number of digits you can enter to the right of a decimal point. Brinqa rounds the decimal numbers you enter, if necessary. For example, if you enter 1.986 in a field with Decimal places set to 2, the number rounds to 1.99. |
| Default value | The value to apply when a new dataset is created. Don’t assign default values to fields that are both required and unique, because uniqueness errors can result. |
| Description | Text that describes the attribute. This description is for administration purposes only and doesn’t display to users on any view that include the field. If you are looking to provide user a hint or help on views, use the attribute help field. |
| Display format | For auto-number fields, enter a Display format to control formatting details such as the minimum number of leading zeros and any prefix or suffix for the number. Begin by entering the required minimum {0} as a placeholder for the auto-number without any leading zeros. Add any prefix to your number before this placeholder and insert any suffix text after the placeholder. |
| Help | The text that displays in the attribute-level help hover text for this attribute. |
| Hidden | Marks the attribute hidden. Hidden attributes are not displayed on views. |
| Index text | Enables full-text searching for this attribute. |
| Length (for text fields) | For text attribute, the maximum number of characters that a user can enter. |
| Length (for number, currency, percent fields) | For number, currency, and percent fields, the number of digits you can enter to the left of the decimal point, for example, 123.45 for an entry of 3. |
| Read only | Marks the attribute read only, users can't edit read only attributes. | Required | Makes the attribute required everywhere in Brinqa. |
| Track history | Enables tracking of every change for attribute. |
| Sharing setting | For master-detail relationship attribute, the Sharing setting determines the sharing access that users must have to a master record to create, edit, or delete its associated detail datasets. |
| Supports filter | Enables filtering for the attributes. When enabled, the attribute will be available to all condition and filter widgets. |
| Supports facets | Enables faceting for the attribute. Faceting is the arrangement of search results into categories based on indexed terms. When searching, users are presented with the indexed terms, along with numerical counts of how many matching results were found for each term. Faceting makes it easy for users to explore search results, narrowing in on exactly the results they are looking for. |
| Unique | If enabled, prevents duplicate attribute values. |
Create a new attribute
Administrators can create and add new attributes to a data model to capture and display data.
Before you begin, determine the type of attribute you want to create.
- Navigate to Administration > Data Management > Data Models
- Select the data model you want to add attributes to and go to the Attributes section
- Click Create Attribute and fill in the following Table 3: New attribute properties
- Click Create.
- Drag the newly created attribute to a desirable location on the attributes table to set the order. Attribute order is used as precedence order when performing calculations.
- Click Update on data model form to ensure newly created attribute is added to the model.
| Field | Description |
|---|---|
| Title | Enter the title of the attribute as you want it to appear on show, form and list views. Brinqa populates Attribute Name using the attribute title. This name can contain only underscores and alphanumeric characters, and must be unique for a given data model. It must begin with a letter, not include spaces, not end with an underscore, and not contain two consecutive underscores. |
| Type | Select an attribute type. |
| Options | Enter attribute options and select the appropriate checkboxes. |
TUTORIAL: "False Positive" Attribute
A false positive attribute can be useful if your team regularly discovers vulnerabilities that are false positives and needs some way to flag them. This tutorial will cover how to create a false positive attribute that is a true/false type field, then cover how to add it to each vulnerability view so it can be seen and interacted with.
Once the attribute has been added to the views, users will be able to flag vulnerabilities as false positives, filter vulnerabilities by whether they are false positives, and see whether a vulnerability has been marked as a false positive.
The existence of this attribute also allows you to create things like scripts and business rules that mark vulnerabilities as false positives automatically if they meet certain conditions.
1) Create the "false positive" attribute.
- Navigate to Administration > Data Management > Data Models
- Select the Vulnerability data model
- Click Create Attribute
- Enter “False Positive” for the Title
- Enter text in the Help field that describes the conditions under which something should be considered a false positive.
- Select “True False” as the attribute Type.
- Select "Active", "Supports filter", and "Supports facets" under Options
- Click Create
- Click Update to save the change to the data model
2) Update the vulnerability list view.
- Navigate to Administration > User Interface > Views
- Find and open the vulnerability list view
- Click the Actions button associated with the list section
- Select Display from the dropdown menu
- Navigate to the Columns tab of the Display modal
- Find the "False Positive" attribute and check the Enabled checkbox next to it
- Click Update
- Click Done to save the change to the view
3) Update the vulnerability show view.
- Navigate to Administration > User Interface > Views
- Find and open the vulnerability show view
- Click the Actions button associated with the leftmost show section, where general details about the vulnerability are displayed
- Select Display from the dropdown menu
- Navigate to the Columns tab of the Display modal
- Find the "False Positive" attribute and check the Enabled checkbox next to it
- Click Update
- Click Done to save the change to the view
4) Update the vulnerability form view.
In some versions of the platform, you will need to follow these steps to add the False Positive attribute to the form view. In newer versions, the attribute will be added automatically when the data model is updated.
- Navigate to Administration > User Interface > Views
- Find and open the vulnerability form view
- Click the Actions button associated with the form section
- Select Display from the dropdown menu
- Navigate to the Columns tab of the Display modal
- Find the "False Positive" attribute and check the Enabled checkbox next to it
- Click Update
- Click Done to save the change to the view